Add Fraud Protection to Framer
This guide walks you through installing Opportify Form Fraud Protection on your Framer website. Once set up, every form submission is analyzed for fraud signals in real-time — bots, disposable emails, VPNs, and more.
How it works
Framer's built-in form component processes submissions through Framer's own backend, which means Framer's native webhook sends data server-to-server — from Framer's infrastructure, not from the visitor's browser. Because Opportify's fraud signals (typing behavior, automation detection, IP reputation, etc.) are collected in the browser, routing through Framer's webhook would strip those signals and report Framer's server IP rather than the visitor's.
Direct-to-Opportify routing is the correct approach for Framer: it preserves the visitor's true IP and behavioral signals in the browser, so every submission is scored against the full signal stack instead of Framer's server context.
The Opportify script handles Framer automatically: when it detects a Framer site, it reads your endpoint ID directly from the script tag, sets the form action, and intercepts the submit event in the browser before Framer's own handler runs. No custom JavaScript snippet is required.
Prerequisites
- Access to the Opportify Admin Console
- Editor or Admin access to your Framer site
Step-by-Step Setup
Step 1 — Open Opportify Admin and Go through Quick Start
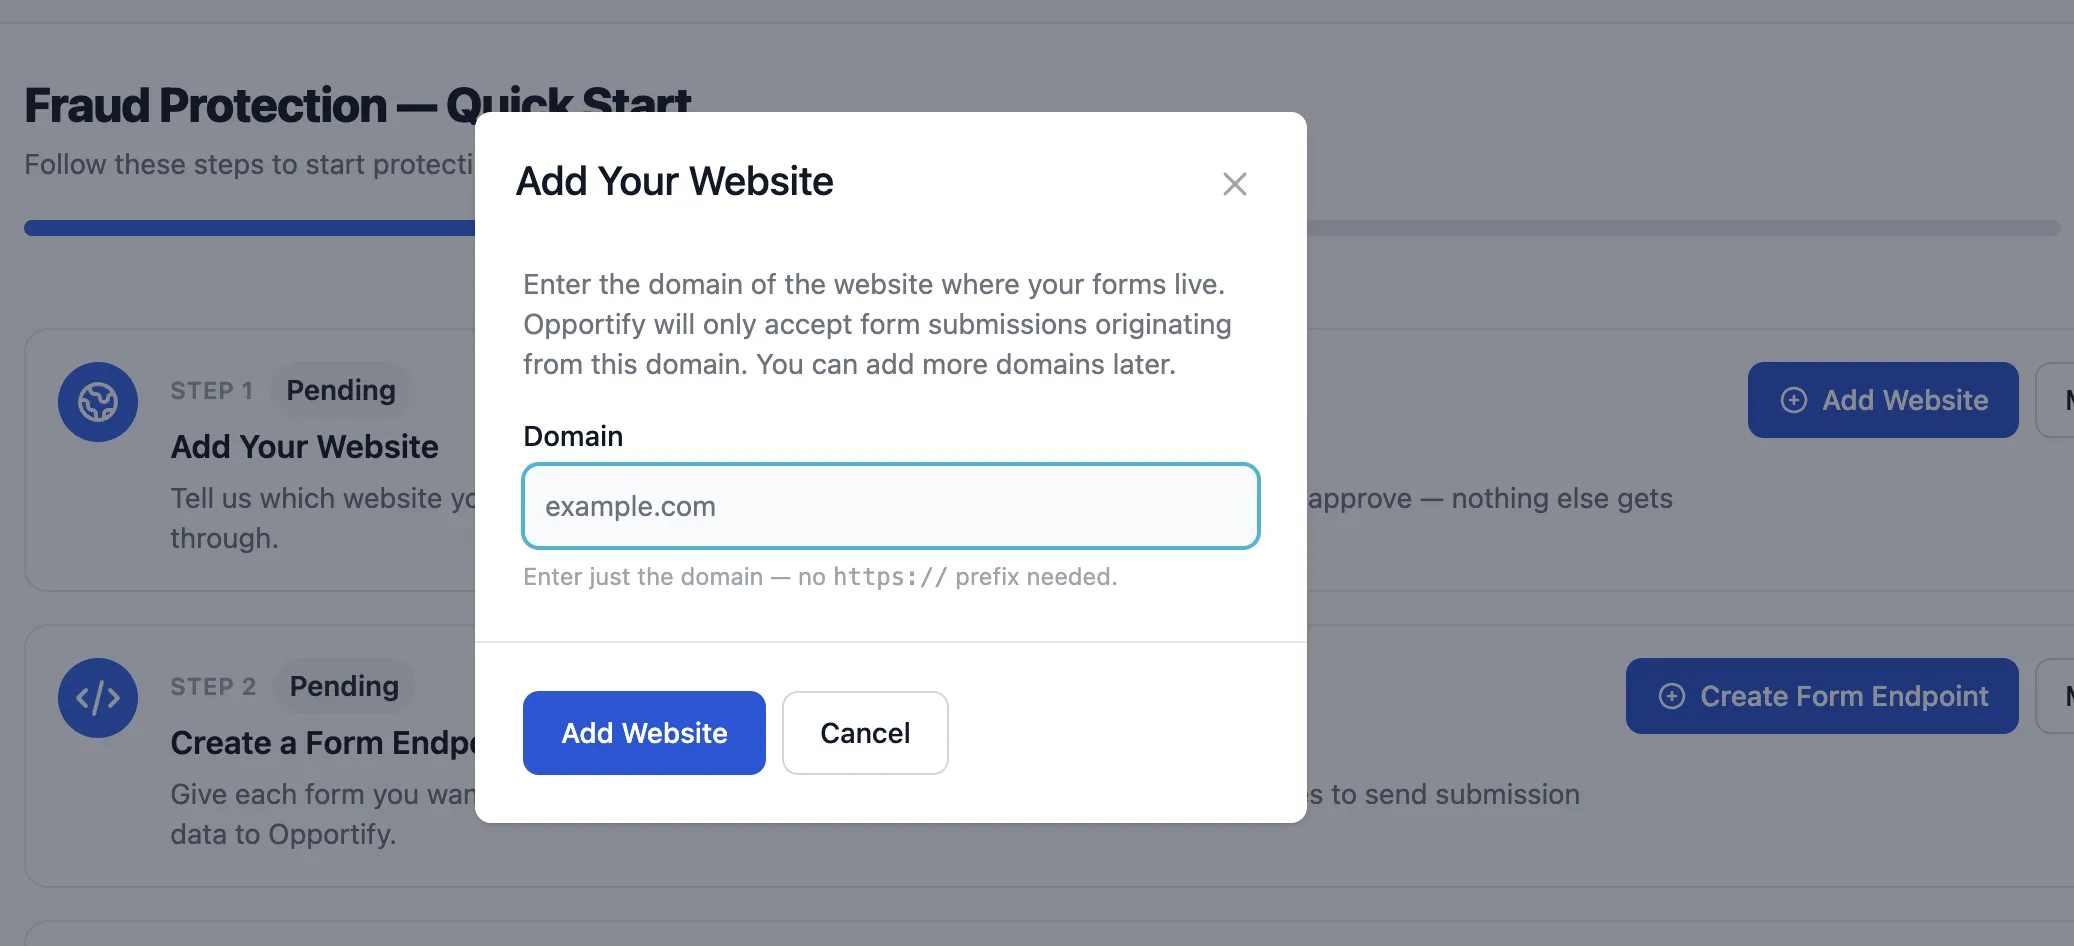
Navigate to the Quick Start and complete at least Step 1 to 3. The Quick Start wizard guides you through everything needed to protect your website.
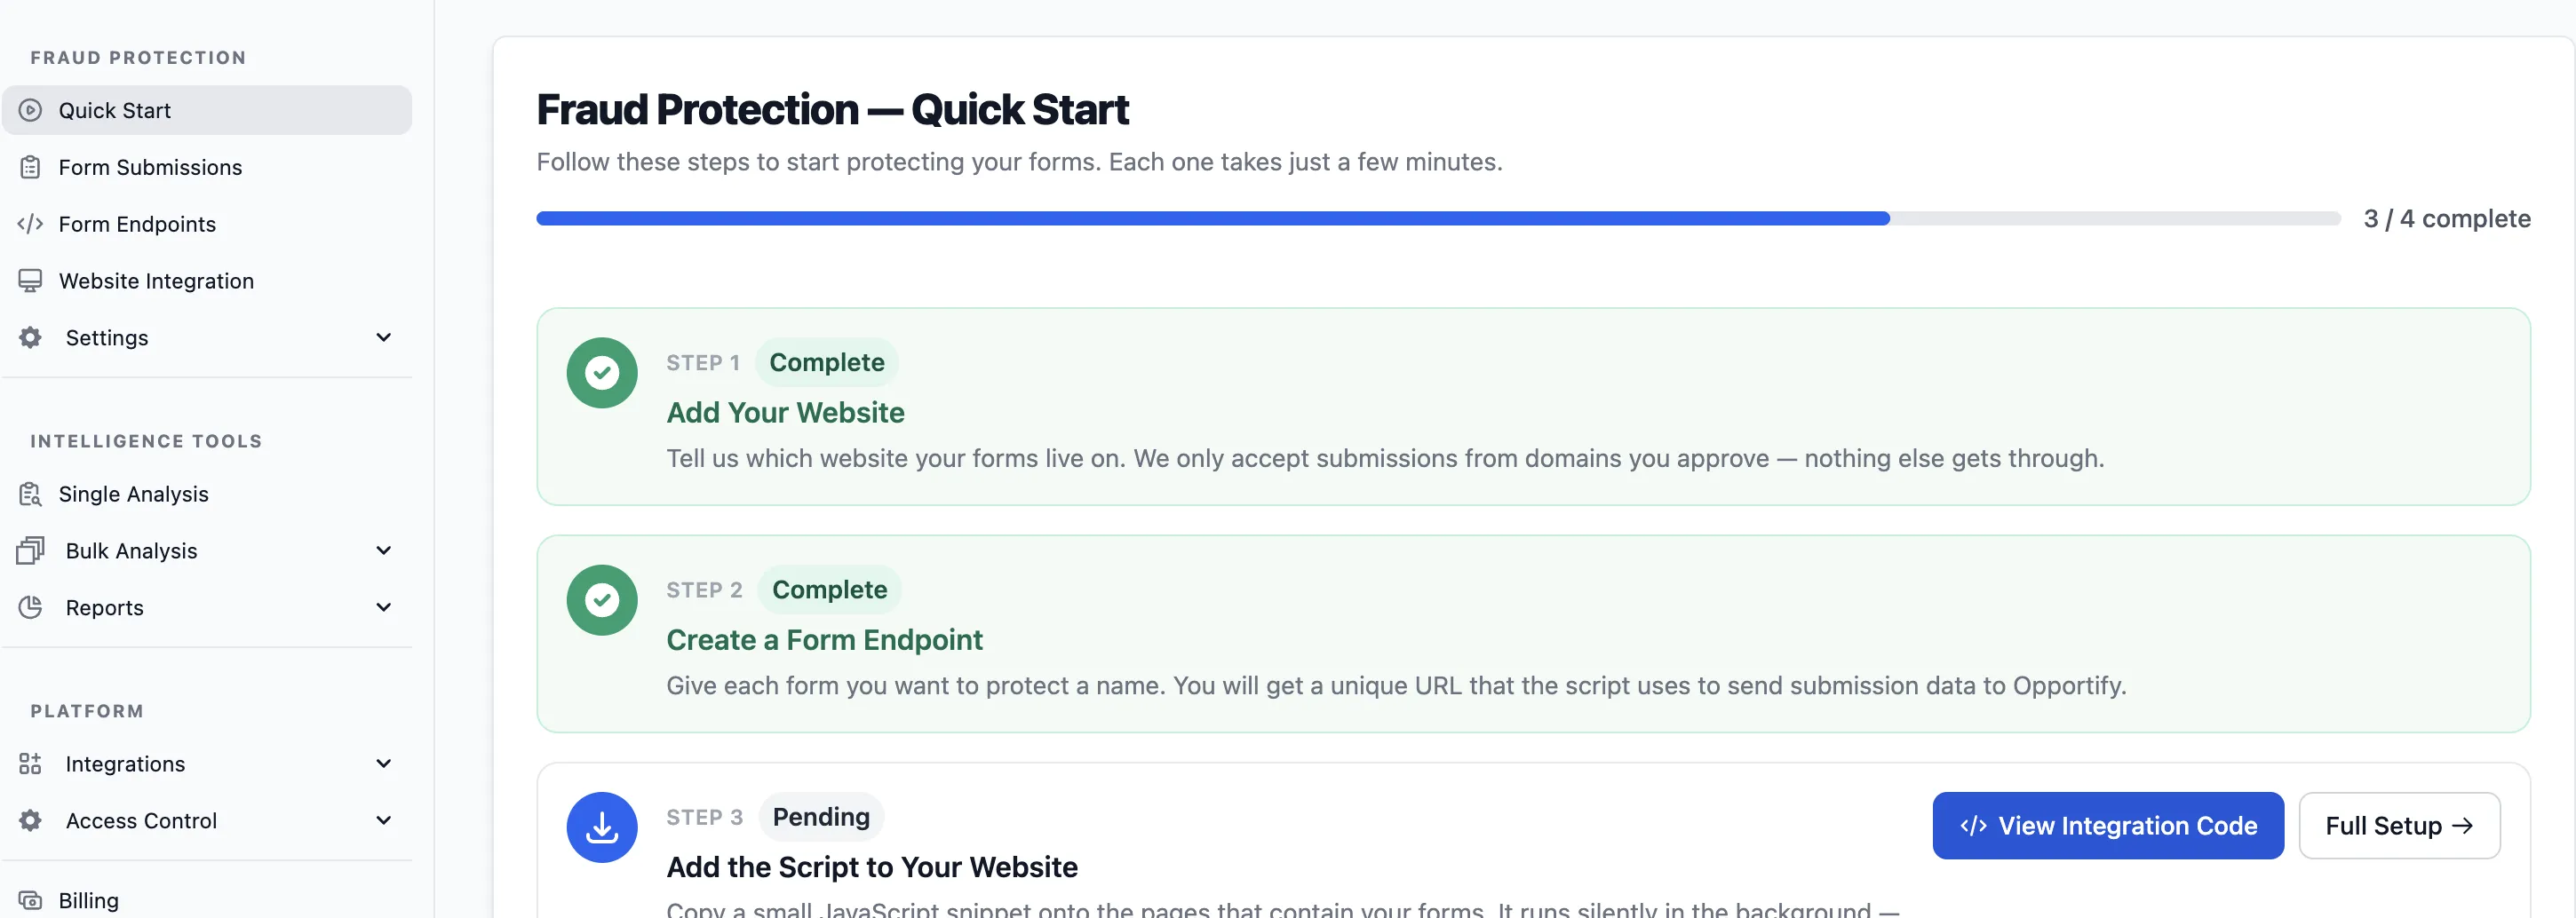
In the Quick Start Step 1, provide your Framer site's domain in the allowlist. You only need the hostname — omit https:// and any trailing slashes.
Example: for
https://my-business.framer.app/entermy-business.framer.app, or if you use a custom domain, just enterexample.com
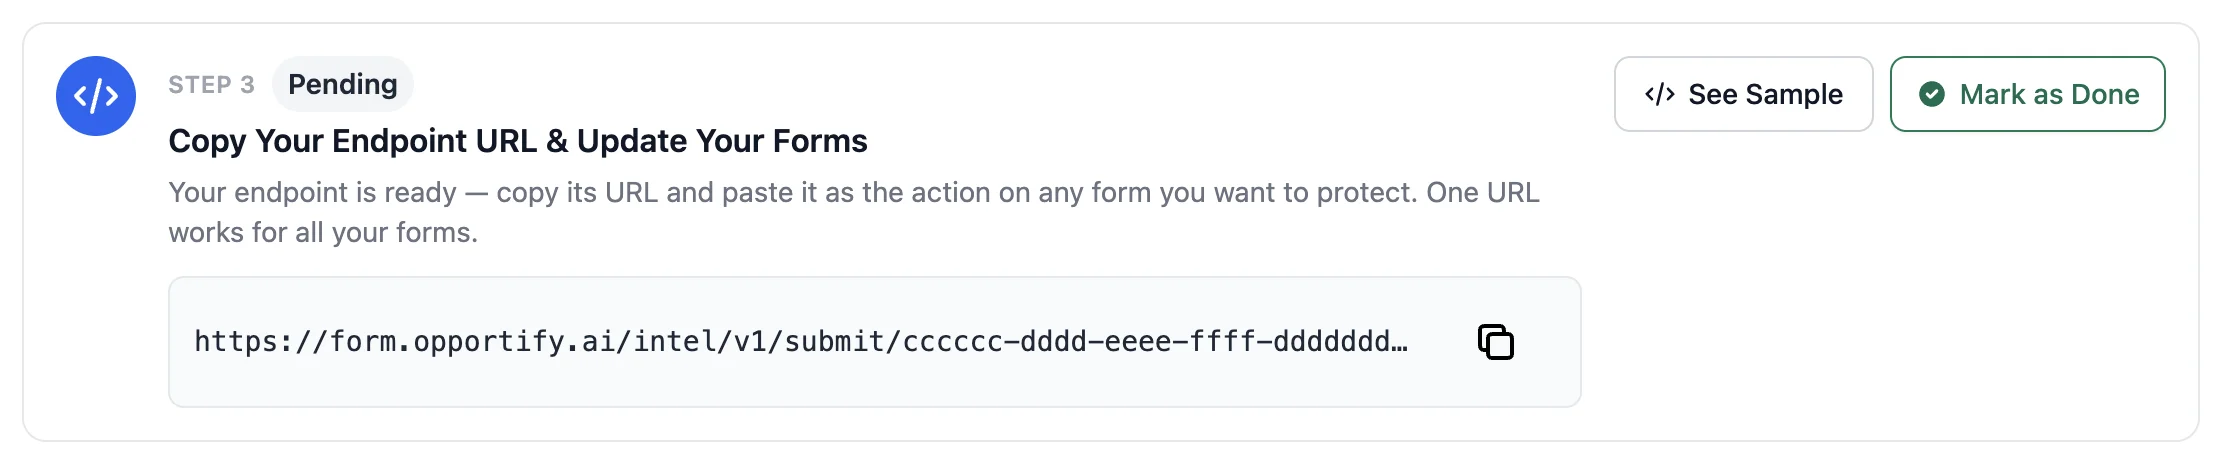
Step 2 — Copy the Endpoint ID from Opportify
The Form Endpoint ties a specific form on your webpage to Opportify's Fraud Protection, so every submission is analyzed before it reaches your backend.
Copy the value from the Submit URL column. The Endpoint ID is the UUID at the end of the URL:
https://form.opportify.ai/intel/v1/submit/<your-endpoint-id>
                                          ^^^^^^^^^^^^^^^^
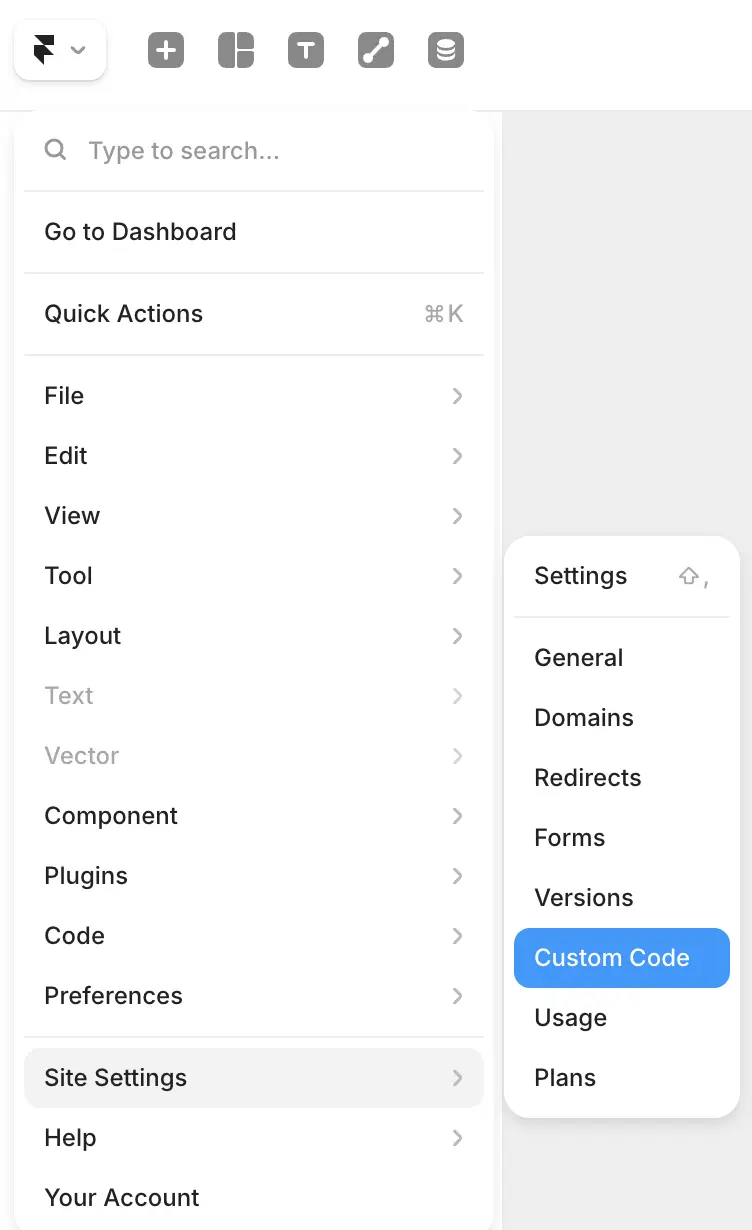
Step 3 — Open Framer Custom Code Settings
In Framer, open Site Settings and navigate to the Custom Code section.
Step 4 — Add the Opportify Script to <head>
Copy the snippet below, replace the two placeholder values, and paste it into the Start of <head> tag field.
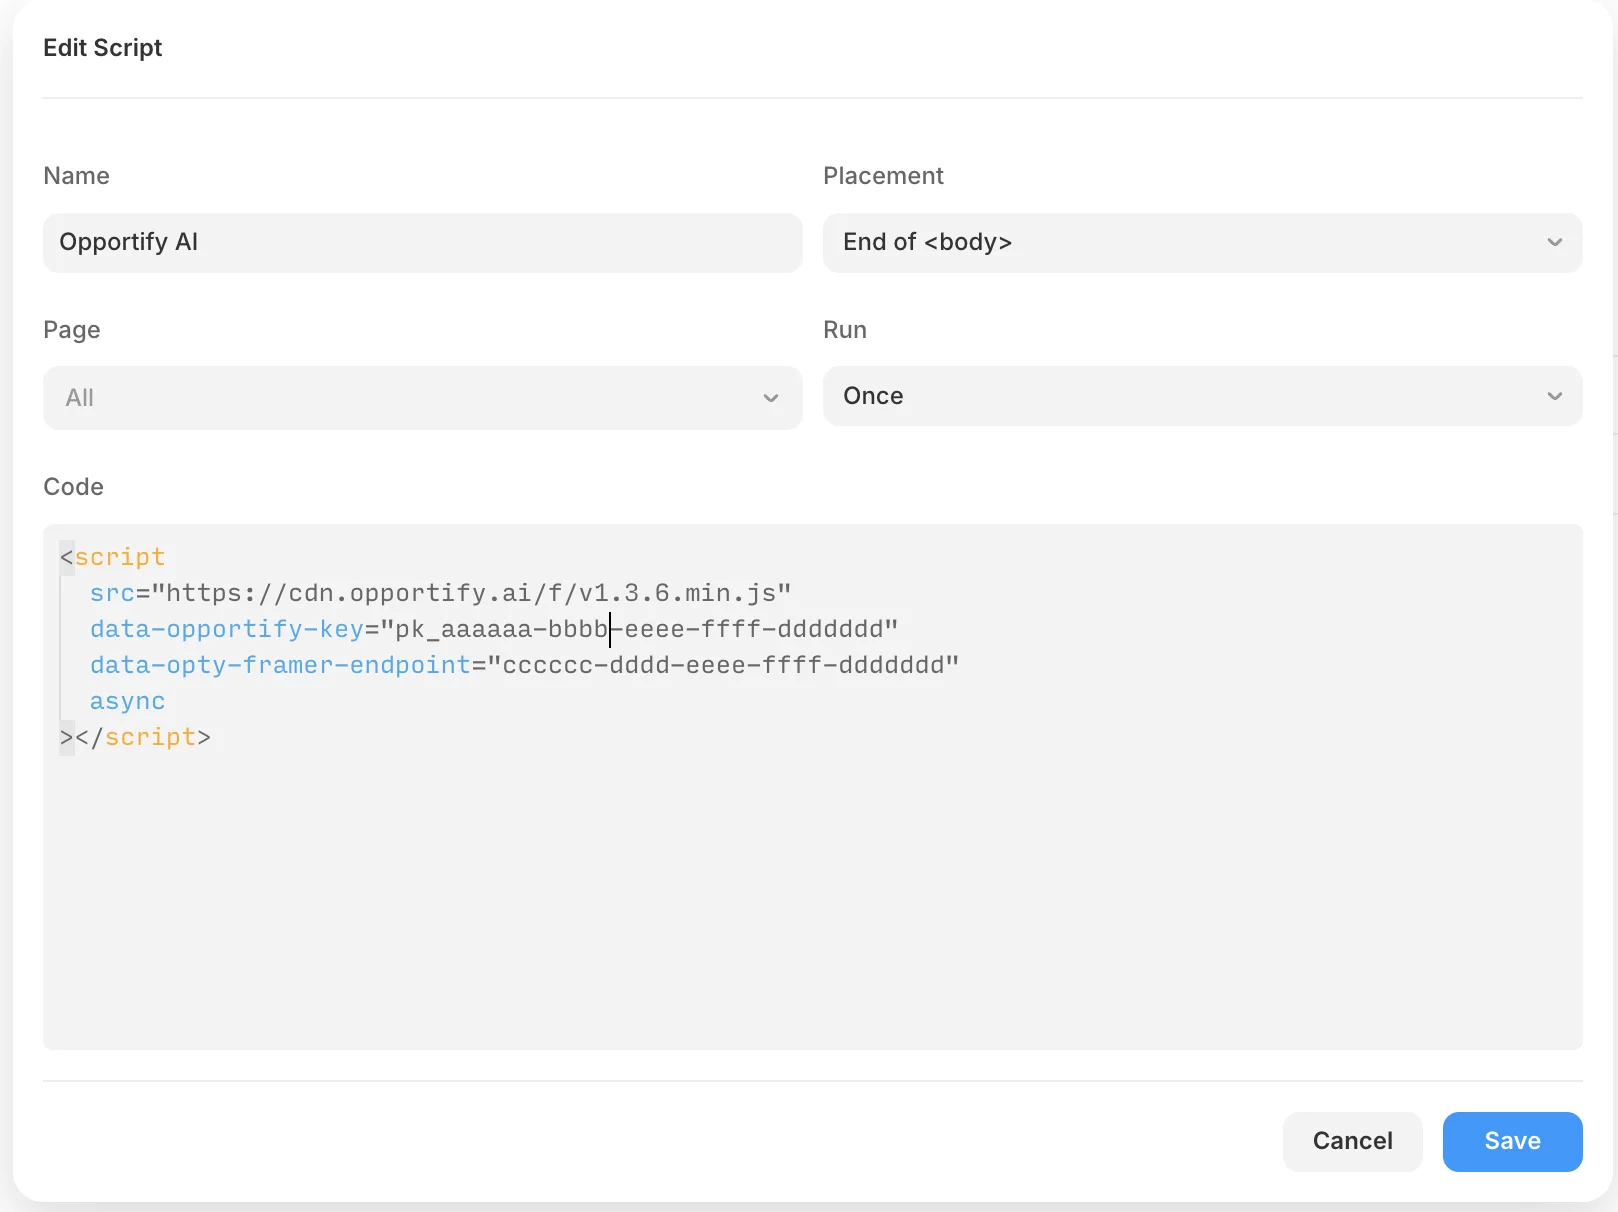
<script
  src="https://cdn.opportify.ai/f/v1.3.6.min.js"
  data-opportify-key="YOUR_PUBLIC_KEY"
  data-opportify-endpoint-id="YOUR_ENDPOINT_ID"
  data-platform="Framer"
  async
></script>
| Attribute | Where to find it |
|---|---|
data-opportify-key | The public key tied to your Form Endpoint (Admin Console → Fraud Protection → Form Endpoints) |
data-opportify-endpoint-id | The UUID at the end of the Submit URL (Step 2). This is the canonical attribute name in the Opportify JS client. |
data-platform | Set to Framer as platform for current Framer integrations |
- Click Save to store the custom code in Framer.
Framer does not apply custom code to your live site until you publish. Saving alone is not enough — the Opportify script will not load on your published site until you publish after saving.
When the script detects it is running on a Framer site, it reads data-opty-framer-endpoint, automatically sets the form's action URL, and intercepts the submit event in the browser before Framer's own handler — no extra code needed.
Step 5 — Setup is Complete
All connections between your Framer site and Opportify's Fraud Protection are now in place.
Return to the Opportify Admin Console and continue through the remaining Quick Start steps to fine-tune your setup:
- Step 4 — Data Retention: Choose how long submission data is kept.
- Alerts: Configure email or in-app alerts for suspicious submissions.
- Webhooks: Export fraud signals and submission data to your own systems or third-party tools.
Verifying the Integration
Confirm you published the site after adding the script — custom code does not run on the live site until then.
After publishing, submit a test entry through your form and check the Form Submissions page in the Opportify Admin Console. A new row should appear within a few seconds.
You can also confirm in DevTools → Network that requests to /intel/v1/init and /intel/v1/submit/{endpointId} appear after submission.
Viewing Form Submissions
Every form submission from your site will appear in the Form Submissions page in the Opportify Admin Console. For each submission you can see:
| Field | Description |
|---|---|
| Risk Score | Numeric fraud risk score (200–1000) — higher means more suspicious |
| Risk Level | Lowest / Low / Medium / High / Highest — colour-coded for quick triage |
| IP Address | The originating IP of the submission |
| Country | Geo-location derived from the IP |
| The email address submitted, if collected | |
| Submitted At | Timestamp of when the submission was received |
| Form Endpoint | Which endpoint (and therefore which form) received the submission |
| Fraud Signals | Individual signals that fired (e.g. disposable email, VPN detected, bot behavior) |
You can filter submissions by risk level, date range, or endpoint to quickly identify and act on suspicious activity.