Add Fraud Protection to Webflow
This guide walks you through installing Opportify Form Fraud Protection script on your Webflow website and connecting it to your forms. Once set up, every form submission on your site will be analyzed for fraud signals in real-time.
Prerequisites
- Access to the Opportify Admin Console
- Editor or Admin access to your Webflow site
Step-by-Step Setup
Step 1 — Open Opportify Admin and Go through Quick Start
Navigate to the Quick Start and complete at least Step 1 to 3. The Quick Start wizard guides you through everything needed to protect your website.
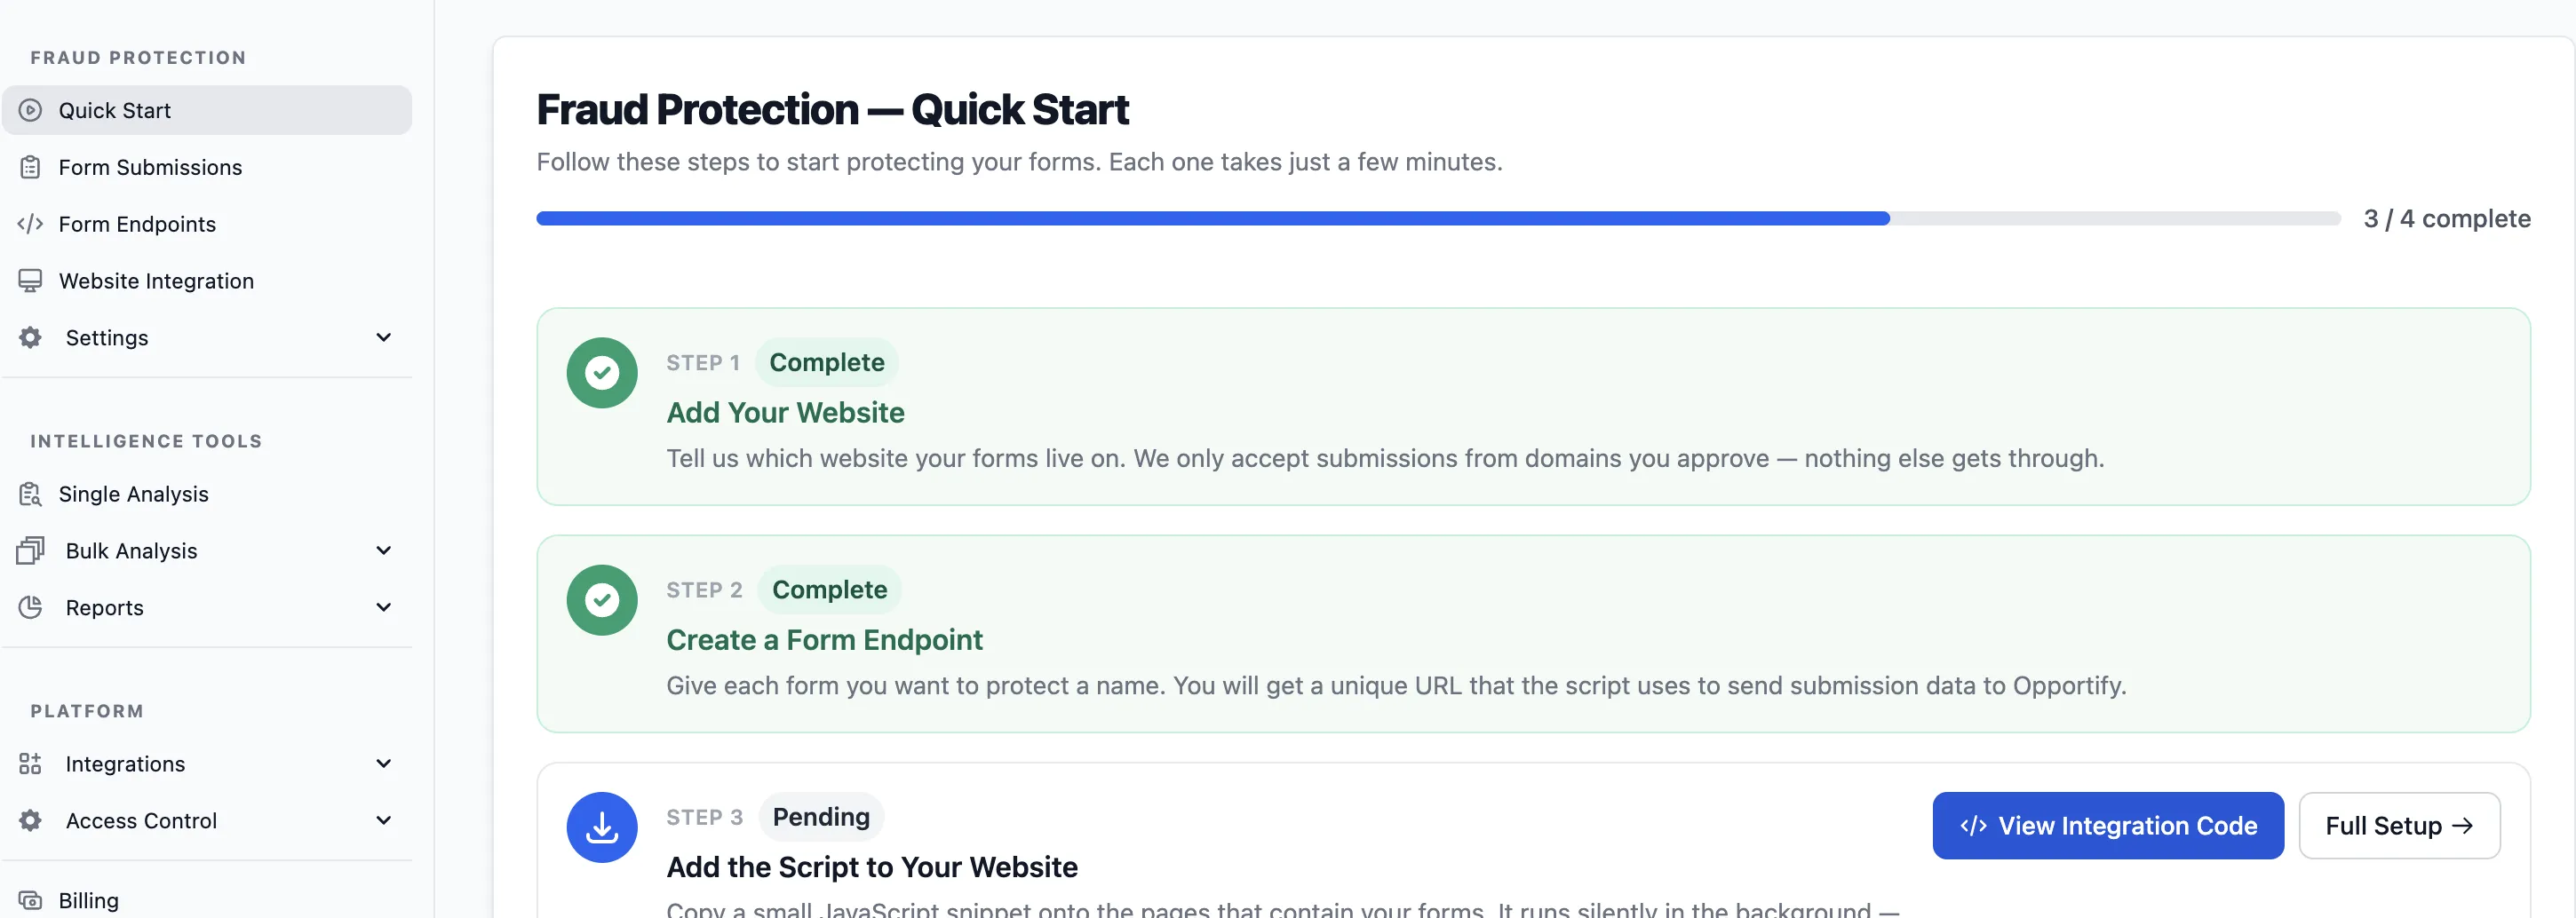
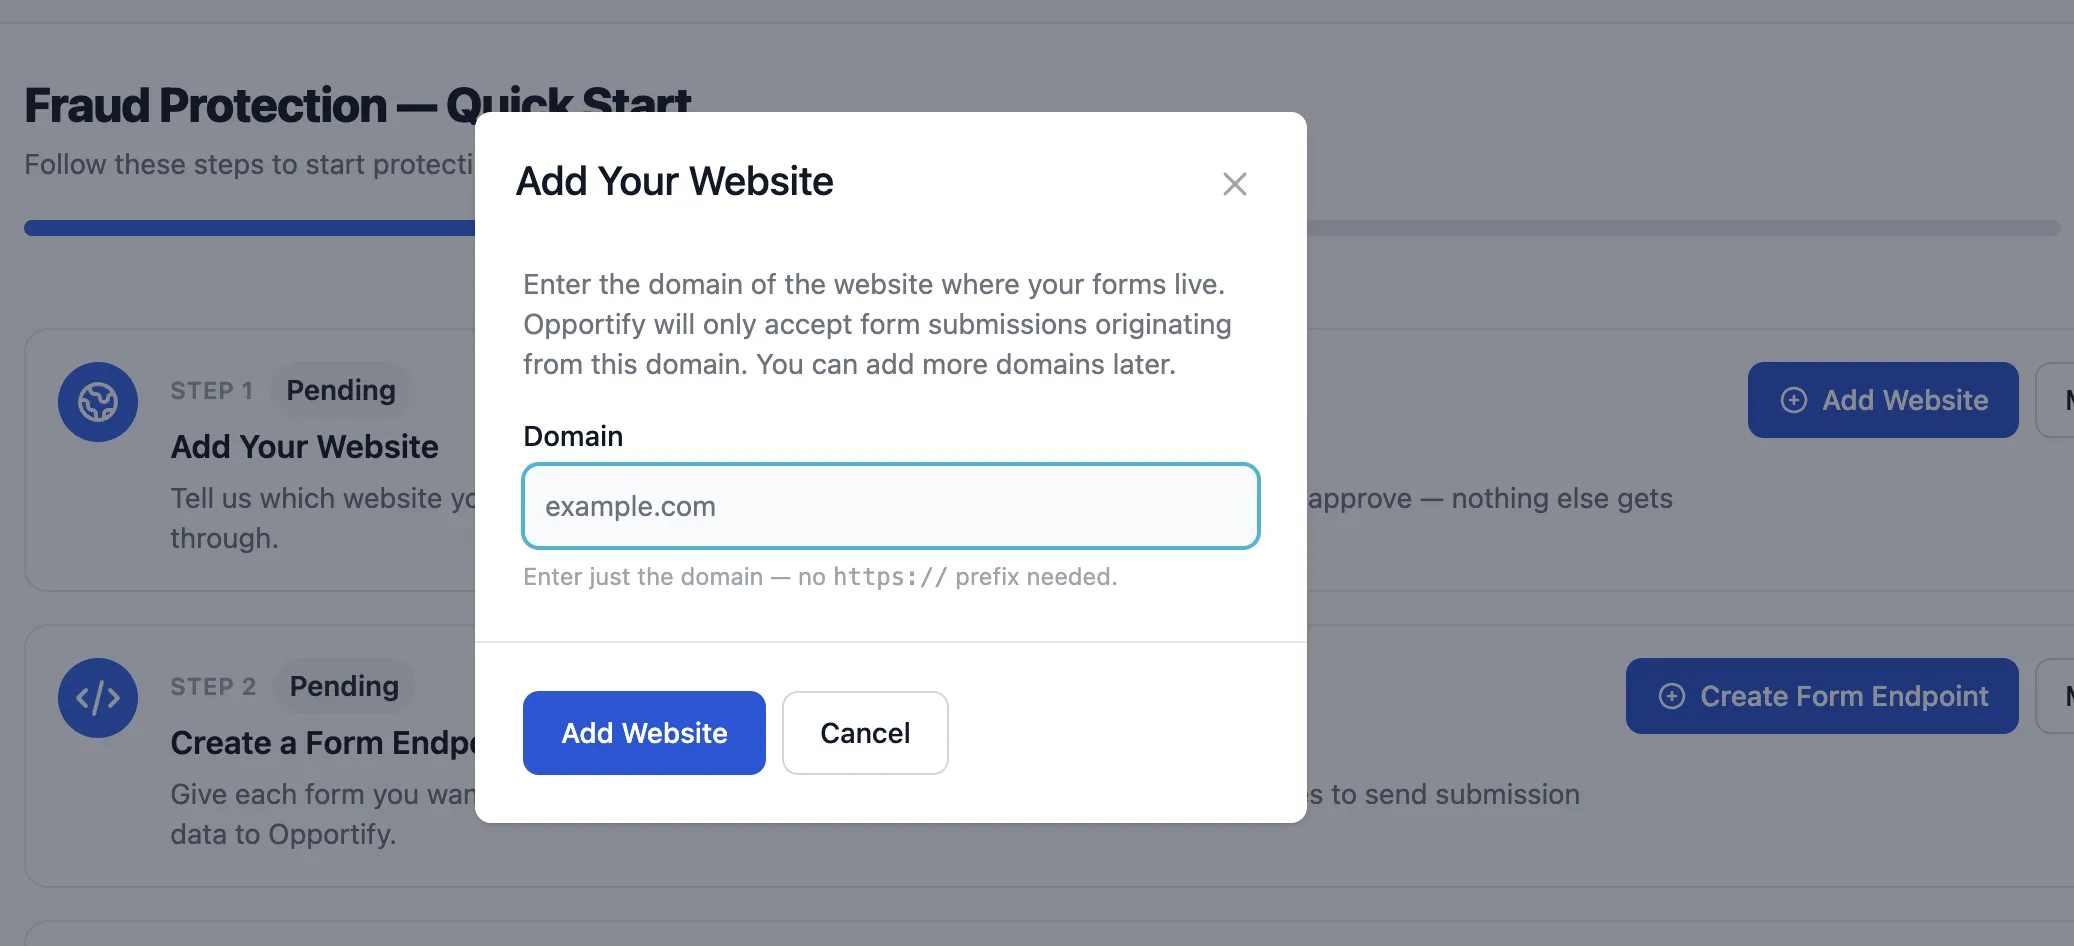
In the Quick Start Step 1, provide your Webflow site's domain in the allowlist. You only need the hostname — omit https:// and any trailing slashes.
Example: for
https://my-business.webflow.io/entermy-business.webflow.io, or if you use a custom domain, just enterexample.com
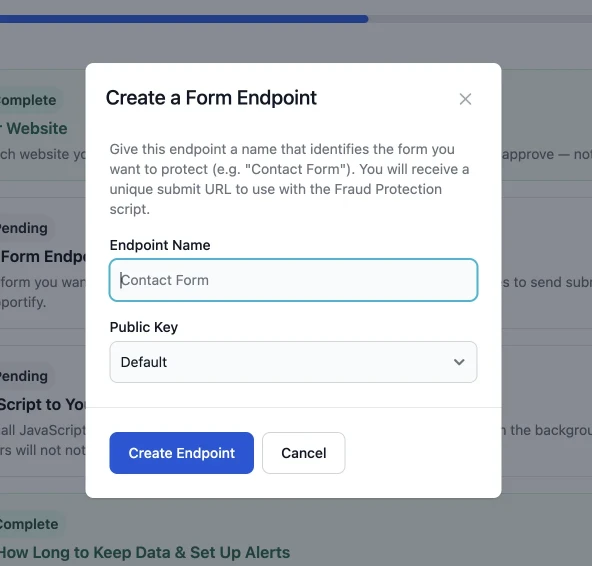
Next: Create a Form Endpoint in Quick Start. Click + New Endpoint, give it a descriptive name, and select a public key.
The Form Endpoint ties a specific form on your webpage to Opportify's Fraud Protection, so every submission is analyzed before it reaches your backend.
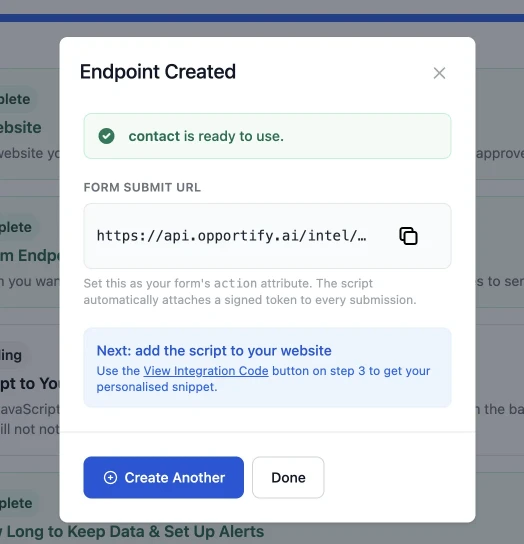
Step 2 — Copy the Form Submit URL from Opportify
Copy the value from the Submit URL column.
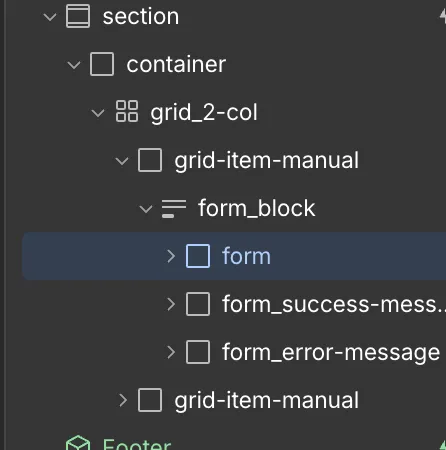
Step 3 — Configure the Webflow Website in Design Mode
-
Open your Webflow project and enter Design mode.
-
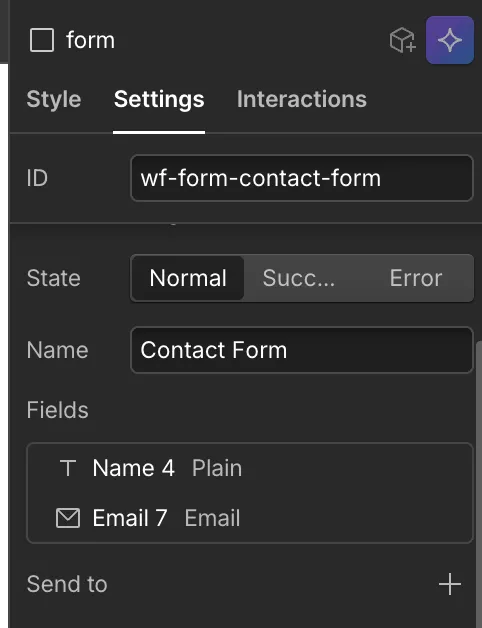
Locate the form you want to associate with Fraud Protection and click on it to select it.
Clear Existing Form Actions
In the right-hand panel, click the Settings tab and find the Send to section. Delete all existing actions.
Clearing existing actions will disable any current form submission handling and integrations that rely on this form (for example, Webflow-native storage, email notifications, and third-party tools). If you still need those behaviors, either recreate them using Opportify (for example, with email notifications and webhooks) or use a separate form that keeps the existing actions.
Add a New Custom Action
Click + Add action (or Custom) to add a new custom action to the form.

Paste the Submit URL in Webflow
Back in Webflow, paste the copied URL into the Action URL field of the custom action and save.

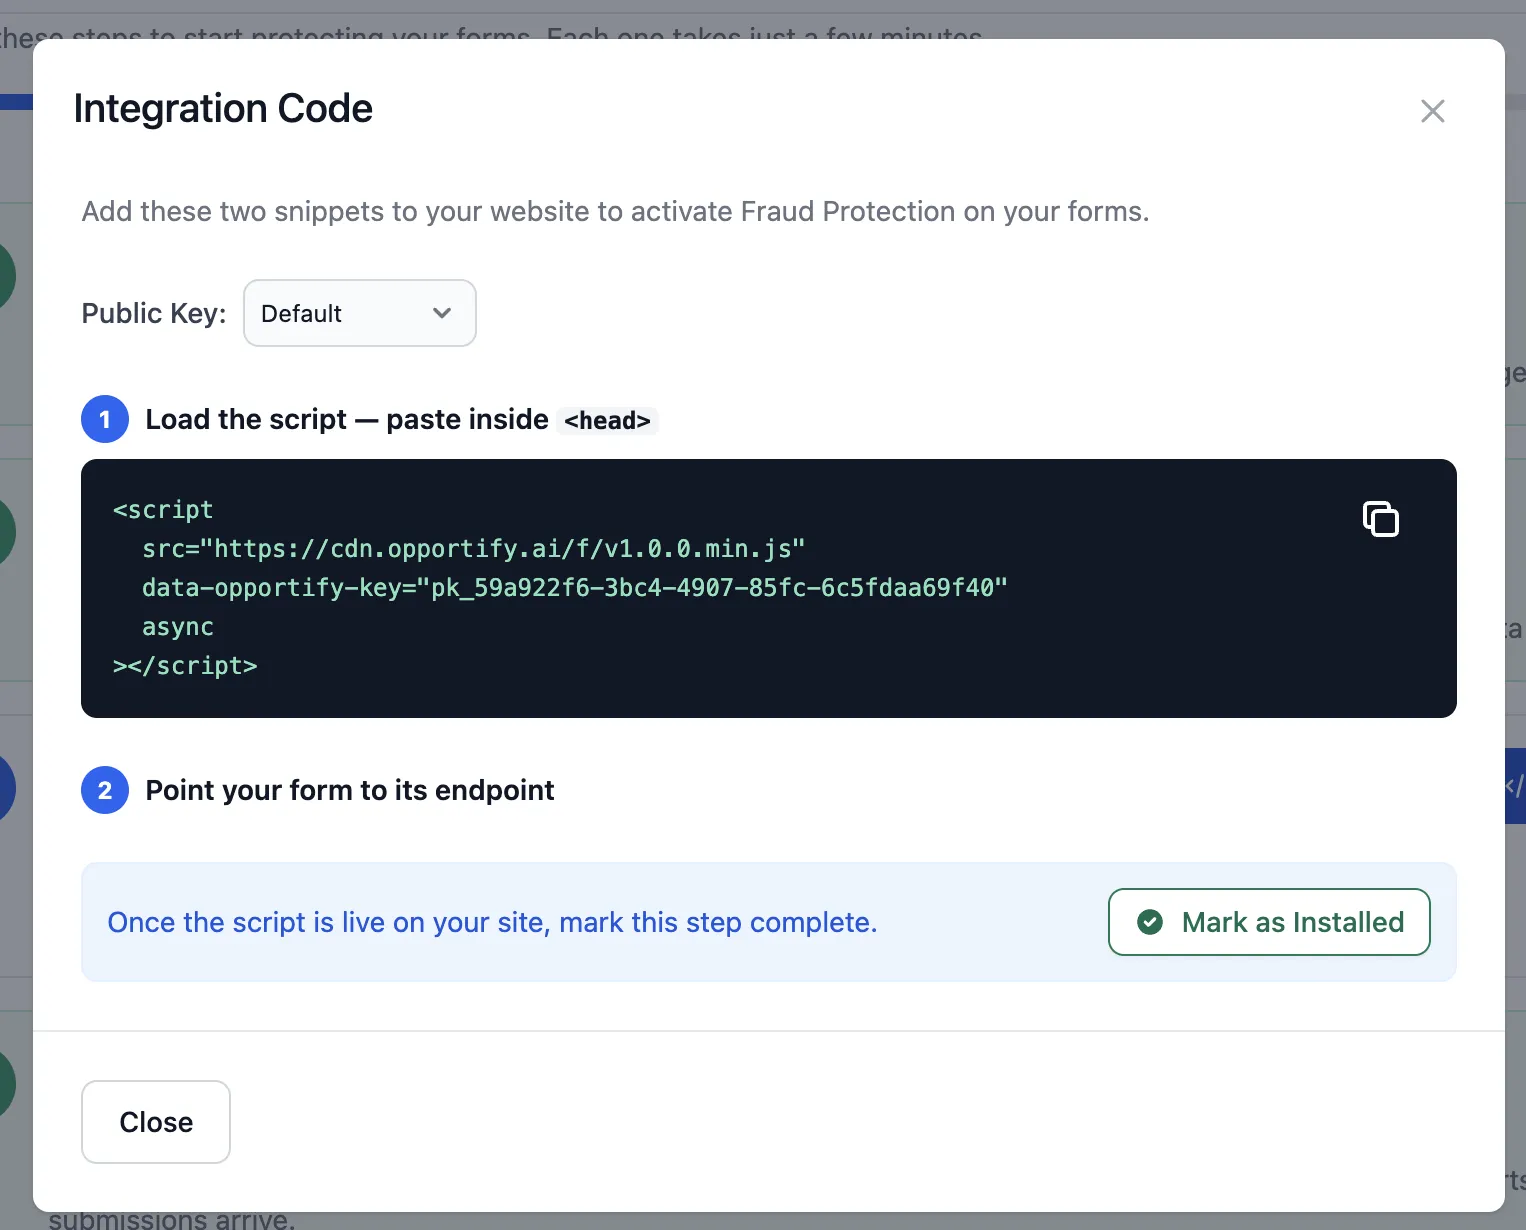
Step 4 — Setup the Fraud Protection Script
Return to the Opportify Admin Console
In the Opportify Admin Console, open Quick Start and go to Step 3 — Add Opportify's Fraud Protection Script to Your Website. Copy the script snippet shown in the first step; paste it into Webflow next.

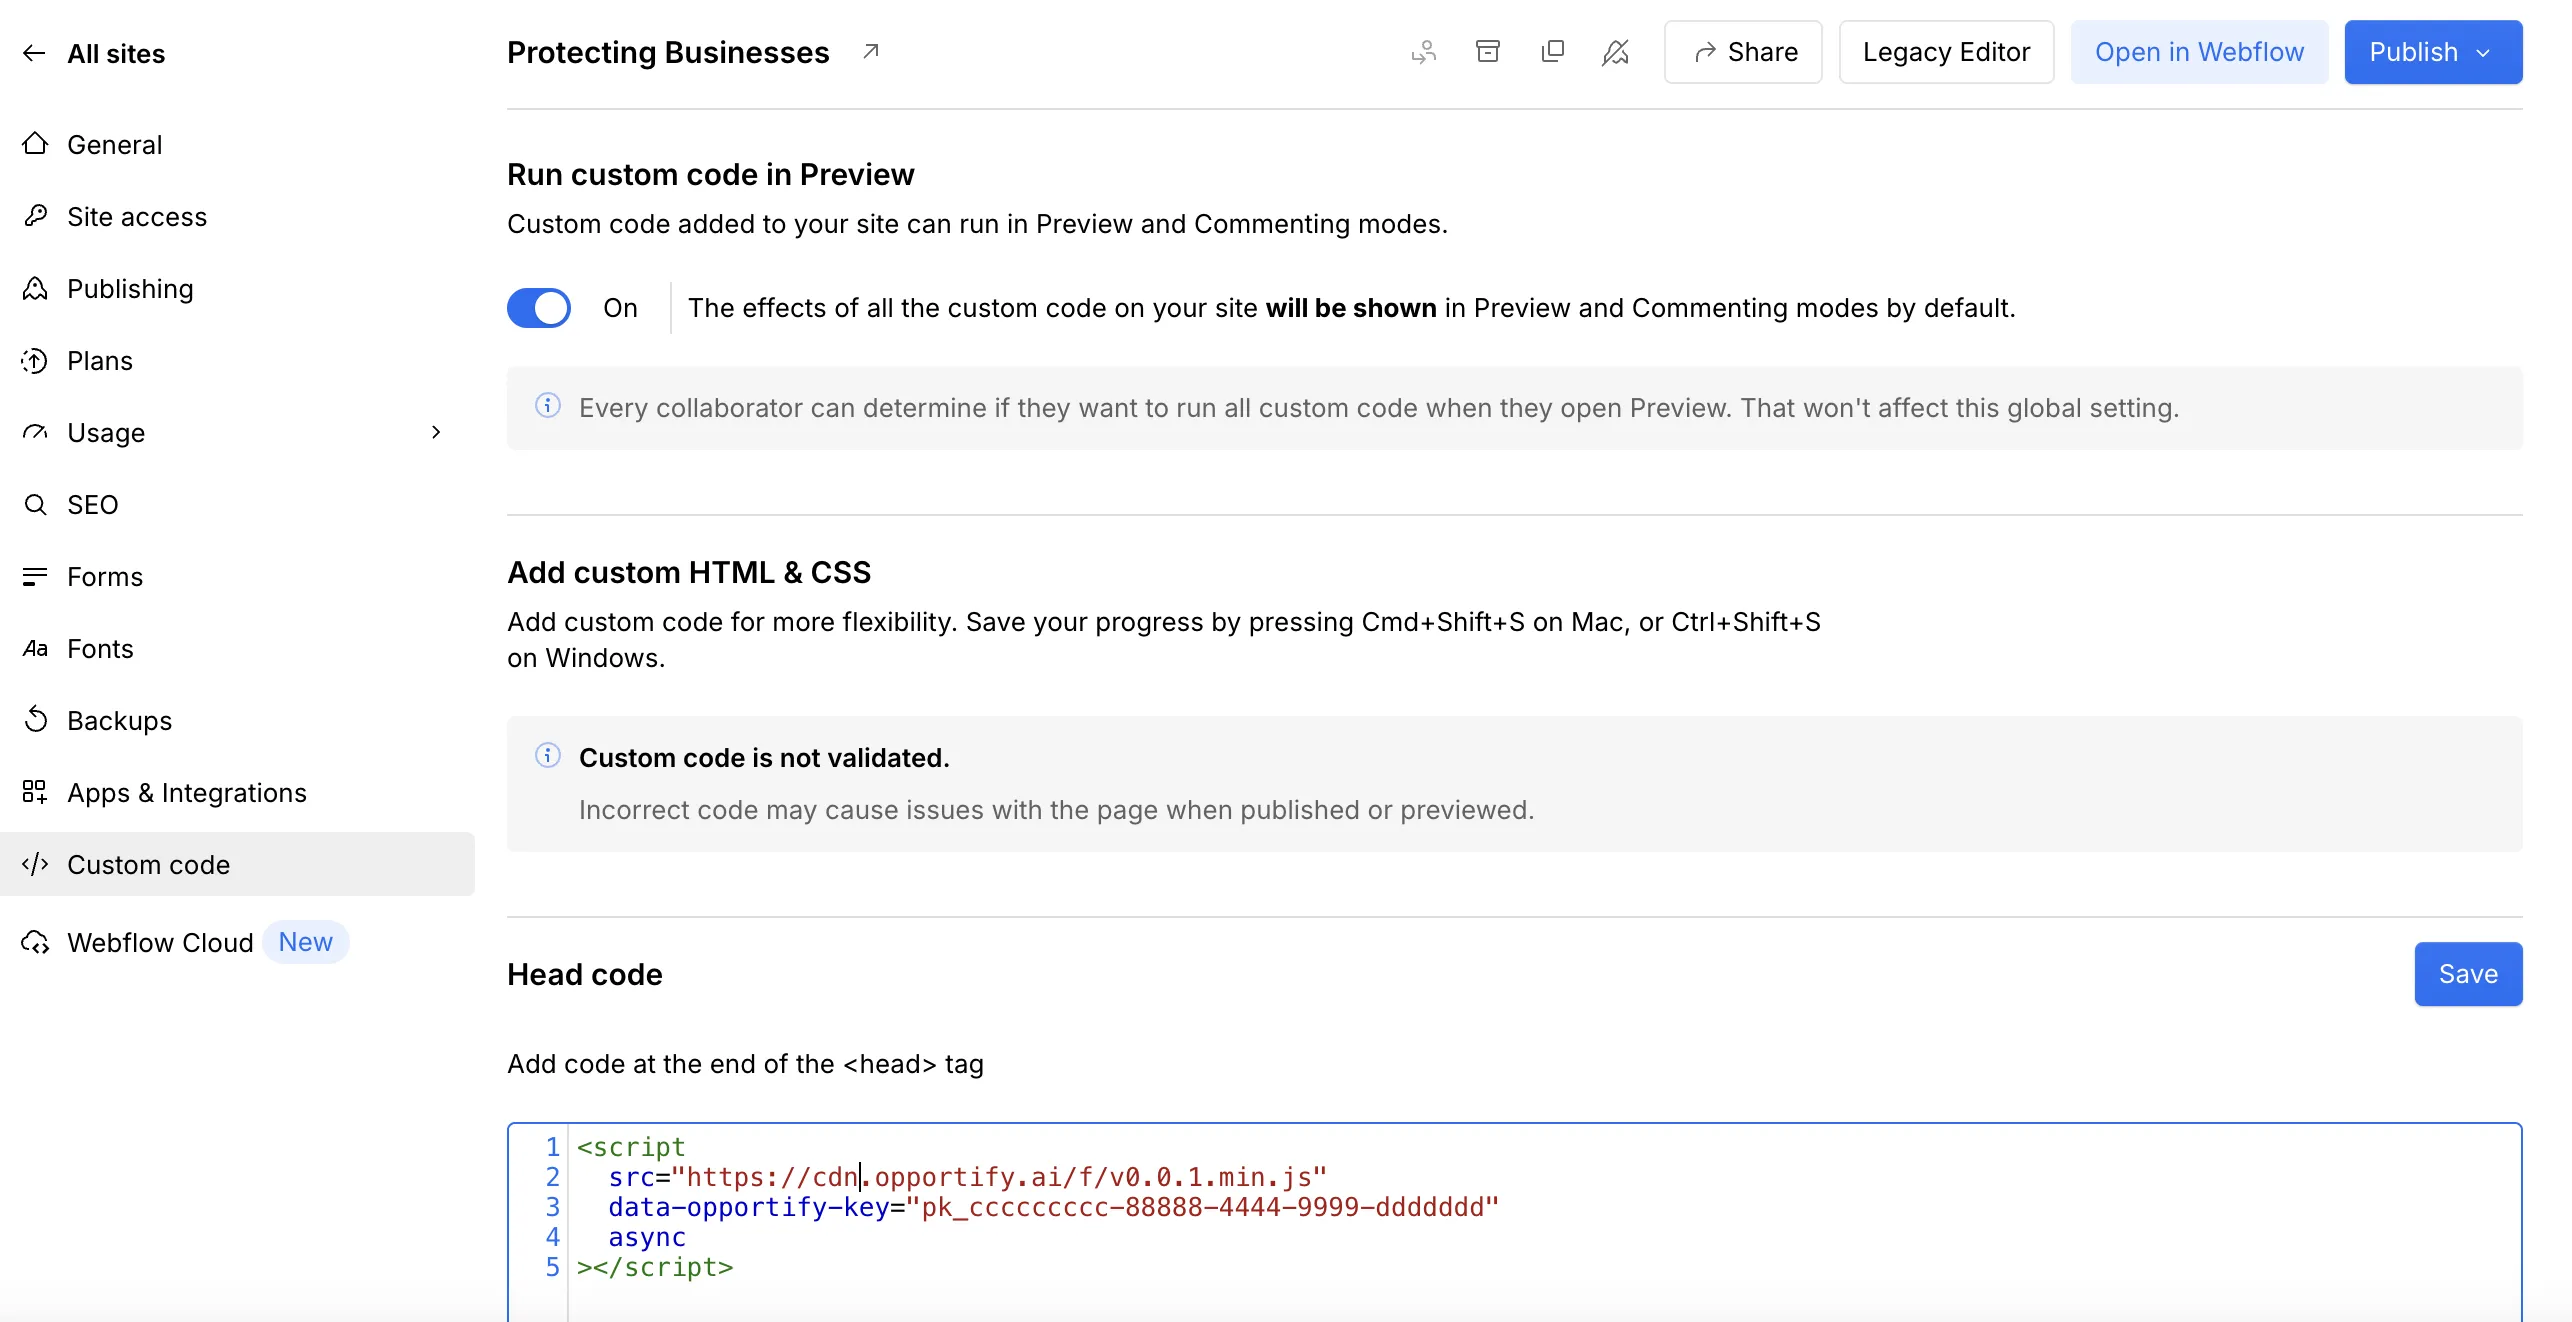
Step 5 — Integrate Webflow with Opportify Fraud Protection
- In Webflow, navigate back to your project and open Site Settings.
- In the left-hand navigation panel, click on the Custom Code section.

Paste the Script into Footer Code
- Scroll down to the Footer Code section and paste the Opportify script there. Click Save Changes.
- Publish your website
Step 6 — Setup is Complete
All the required connections between Webflow and Opportify's Fraud Protection are now in place.
Return to the Opportify Admin Console and continue through the remaining Quick Start steps to fine-tune your setup:
- Step 4 — Data Retention: Choose how long submission data is kept.
- Alerts: Configure email or in-app alerts for suspicious submissions.
- Webhooks: Export fraud signals and submission data to your own systems or third-party tools.
Viewing Form Submissions
After deploying, every form submission from your site will appear in the Form Submissions page in the Opportify Admin Console. For each submission you can see:
| Field | Description |
|---|---|
| Risk Score | Numeric fraud risk score (200–1000) — higher means more suspicious |
| Risk Level | Lowest / Low / Medium / High / Highest — colour-coded for quick triage |
| IP Address | The originating IP of the submission |
| Country | Geo-location derived from the IP |
| The email address submitted, if collected | |
| Submitted At | Timestamp of when the submission was received |
| Form Endpoint | Which endpoint (and therefore which form) received the submission |
| Fraud Signals | Individual signals that fired (e.g. disposable email, VPN detected, bot behavior) |
You can filter submissions by risk level, date range, or endpoint to quickly identify and act on suspicious activity.